Elements code tutorial
MVC Web application example in C# using .NET Core
Microsoft have created an open source version of their .NET platform called .NET Core that runs on a variety of operating systems. We will use C# (the most popular .NET language) for this example and build an application using the MVC web framework.
Installing the .NET Core SDK
You can skip this step if you already have the .NET Core SDK installed.
Before installing the .NET Core SDK, you’ll need to register the Microsoft key used to validate the required repository, register the product repository itself, and then install the required dependencies.
Open a command prompt and run the following two commands.
NOTE: The command you run after ‘wget’ is dependant on the which distribution of Linux you are running. Please check here to get the right one. There are only two lines below so note the text wrap. The first starts with “wget”, the second with “sudo”.
wget -q https://packages.microsoft.com/config/ubuntu/18.04/packages-microsoft-prod.deb
sudo dpkg -i packages-microsoft-prod.deb
Now we can install the .NET Core SDK:
sudo add-apt-repository universe
sudo apt-get install apt-transport-https
sudo apt-get update
sudo apt-get install dotnet-sdk-2.1
Creating the application
We will be using the Model, View, Controller (MVC) pattern for our app. We will also be using an existing class to handle the calls to our Elements daemon and simplify our code. We will amend the default Home controller to call this class and pass the data it returns back to the relevant View using a new Model that we’ll also create.
To get started, create a directory for our MVC app and move into it:
mkdir ElementsMVC
cd ElementsMVC
Use the dotnet tool to create a new template mvc site. This will set up the required folder structure, files, and configuration needed to serve the web app:
dotnet new mvc
Check it is set up correctly by running the app:
dotnet run
When it says the application has started, browse to https://localhost:5001
You should see the template site running, all we have to do is add our own code to what’s already there.
Shut the app down using Ctrl+C.
Now we will start adding our own code so that we can query our Elements node and display the results on the app’s home page.
Create a new file named dotnetcoreDynamicJSON-RPC.cs in the ElementsMVC directory and paste in the raw code of the ‘Dynamic JSON RPC class’ and save it. Alternatively, clone the GitHub repository into a different directory and copy the dotnetcoreDynamicJSON-RPC.cs file into your ElementsMVC directory.
This class is a C# wrapper class intended to enable simple dynamic JSON RPC calls to Bitcoin, Elements and other RPC enabled daemons. The project, along with examples of how to use it, can be found here. All we need for now though is to copy the code from the raw link
That class enables us to easily query our node. We’ll add the code to call it soon, first we need a way to pass the data that we get back from our node to the web page for display. For that we need a Model. We’ll create a simple one that you can add to later.
Create a new file named ExampleNodeInfo.cs in ElementsMVC/Models and paste the following into it:
using System;

namespace ElementsMVC.Models
{
    public class ExampleNodeInfo
    {
        public string Balance { get; set; }

        public string Message { get; set; }
        //Add whatever other properties you want here
    }
}
Now we have; a way to get data from our node, a Model that lets us pass the data to the View for display.
Open the HomeController.cs file in ElementsMVC/Controllers. We will be adding code to call the Dynamic JSON RPC class to get data from our Elements node, populate our Model with the results and hand the Model to the landing page’s View for display.
To the top of the HomeController.cs file, add the following:
using DotnetcoreDynamicJSONRPC;
Then replace the Index method so it looks like the following.
NOTE: Edit the 4 rpc related variables to authenticate against the node you are using if they differ from the defaults we have been using for the rest of the tutorial. Some of the lines below may wrap when viewed in a browser.
public IActionResult Index()
{
    // We will be using an Elements node in this example.
    // It is easy to switch to use a Bitcoin, Liquid node.
    // You need to change these to make sure you can authenticate against the daemon you are running:
    string rpcUrl = "http://localhost";
    string rpcPort = "18884";
    string rpcUsername = "user1";
    string rpcPassword = "password1";

    // For examples and notes on how to use the dotnetcoreDynamicJSON-RPC tool and its JSON helper methods please see:
    // https://github.com/wintercooled/dotnetcoreDynamicJSON-RPC

    // Initialise an instance of the dynamic dotnetcoreDynamicJSON_RPC class.
    dynamic dynamicRPC = new DynamicRPC(rpcUrl, rpcPort, rpcUsername, rpcPassword);

    // Initialise our model that will be passed to the view
    var nodeInfo = new ExampleNodeInfo();

    if (dynamicRPC.DaemonIsRunning())
    {
        try
        {
            // Get the JSON result of the 'getwalletinfo' RPC on the Elements node.
            string balance = dynamicRPC.getwalletinfo();

            // Use the DotnetcoreDynamicJSONRPC 'GetProperty' string helper to return the property value we want.
            balance = balance.GetProperty("result.balance.bitcoin");

            // Populate the model
            nodeInfo.Balance = balance;
        }
        catch (Exception e)
        {
            nodeInfo.Message = e.Message;
        }
    }
    else
    {
        nodeInfo.Message = "Could not communicate with daemon";
    }

    // Return the view and the associated model we have populated
    return View(nodeInfo);
}
Next, edit the Index.cshtml file in ElementsMVC/Views/Home and replace all the existing content with the following code. The code takes our Model and displays the data in it on the default web page.
@model ElementsMVC.Models.ExampleNodeInfo

@{
    ViewData["Title"] = "Index";
}

<h2>Example Node Info</h2>

@{
    if (Model.Message != "")
    {
        <h3>@Model.Message</h3>
    }
}

<div>
    <h4>Basic Wallet Info</h4>
    <hr />
    <dl class="dl-horizontal">
        <dt>
            @Html.DisplayNameFor(model => model.Balance)
        </dt>
        <dd>
            @Html.DisplayFor(model => model.Balance)
        </dd>
    </dl>
</div>
Running the application
Before we try running our code we’ll make sure the required daemons are running:
cd
cd elements
cd src
bitcoind -datadir=$HOME/bitcoindir
./elementsd -datadir=$HOME/elementsdir1
If you get an error saying they are already running that’s fine.
NOTE: If you get an error connecting to the elements client when you run the code below it may be because your node has been left in an altered state after quitting the tutorial code at an early stage. To refresh and reset the daemon’s blockchain and config files re-run the first section of the tutorial code up to and including the lines where the 3 config files are copied into the new directories, then run the commands above to start the required daemons.
Now we can run our code. Make sure your terminal is at the ElementsMVC directory level and run the following:
dotnet run
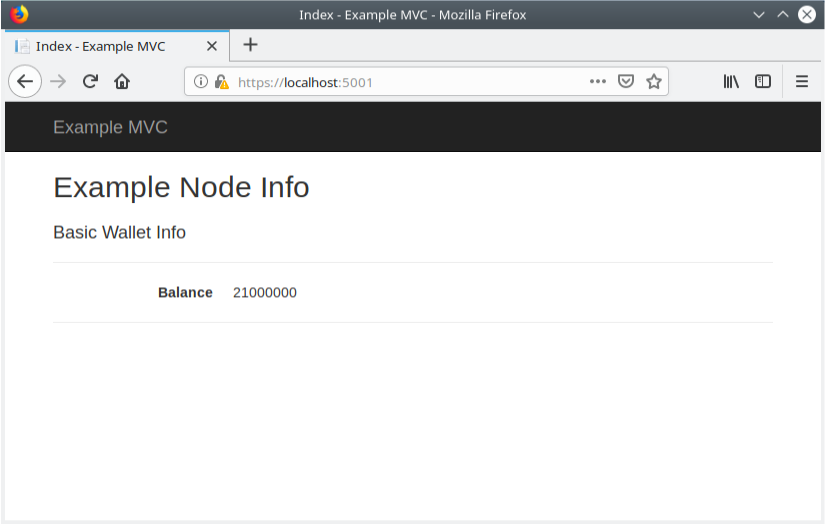
When it says the application has started, browse to https://localhost:5001
The balance of our Elements node’s wallet is displayed on the page!
Next steps
That should have got you up and running and in order to extend your application, you can look at the examples on the Dynamic JSON RPC class GitHub site.